CT DENOISE · PROFESSIONAL · RESEARCH & EDUCATION
CT denoising for DICOM series, on your own computer.
OmniDICOM is a DICOM viewer for Mac and Windows with Denoise, which works on CT and MR series and X-ray images. Open a CT series and click Denoise: it estimates the noise in each slice and removes it, starting with the slice on screen. Click again for the original. Denoise runs on your own computer: no image is uploaded, and it never changes your DICOM files. It is part of Professional, which the 14-day trial includes. For research and education only, not for diagnosis.
No card required. Every computer starts with 14 days of Professional; after that, Denoise needs a Professional licence.
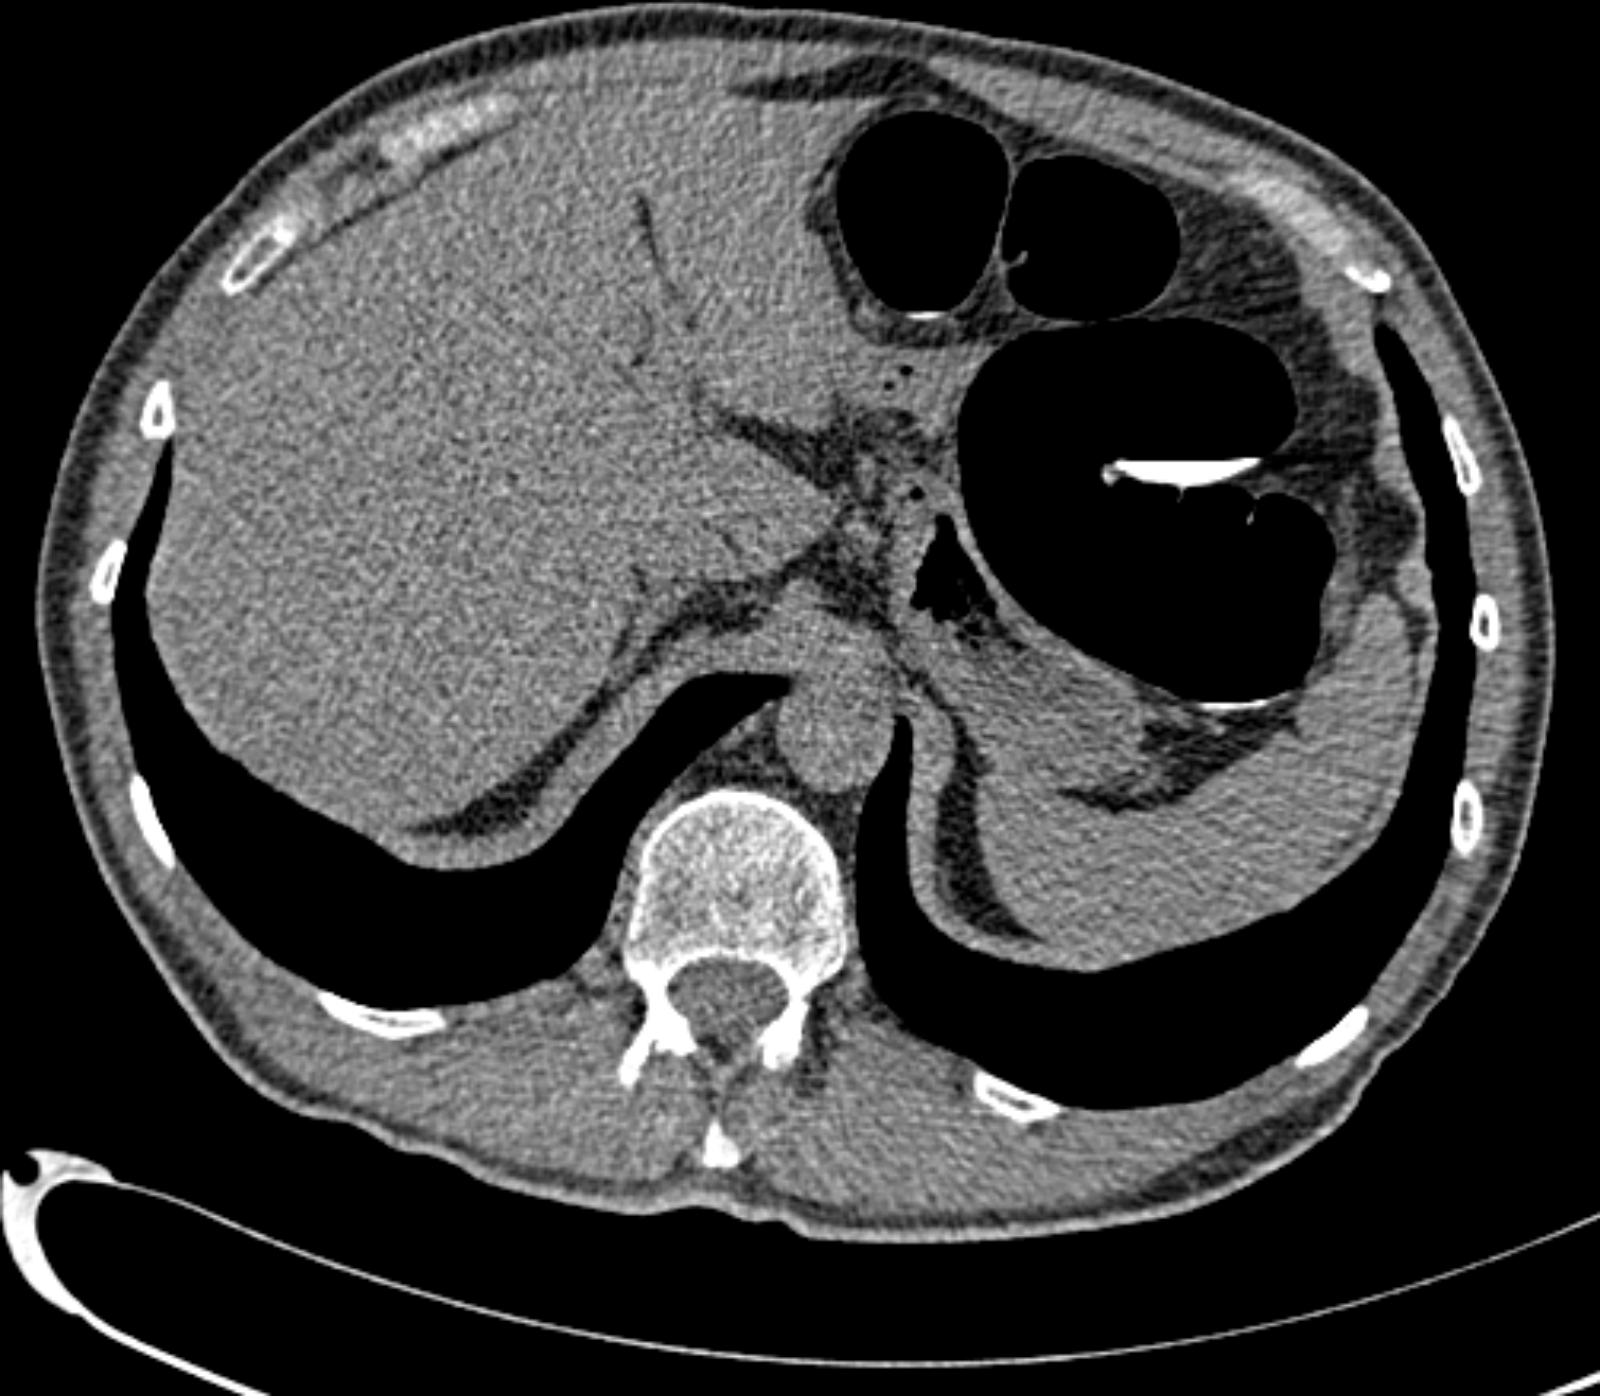
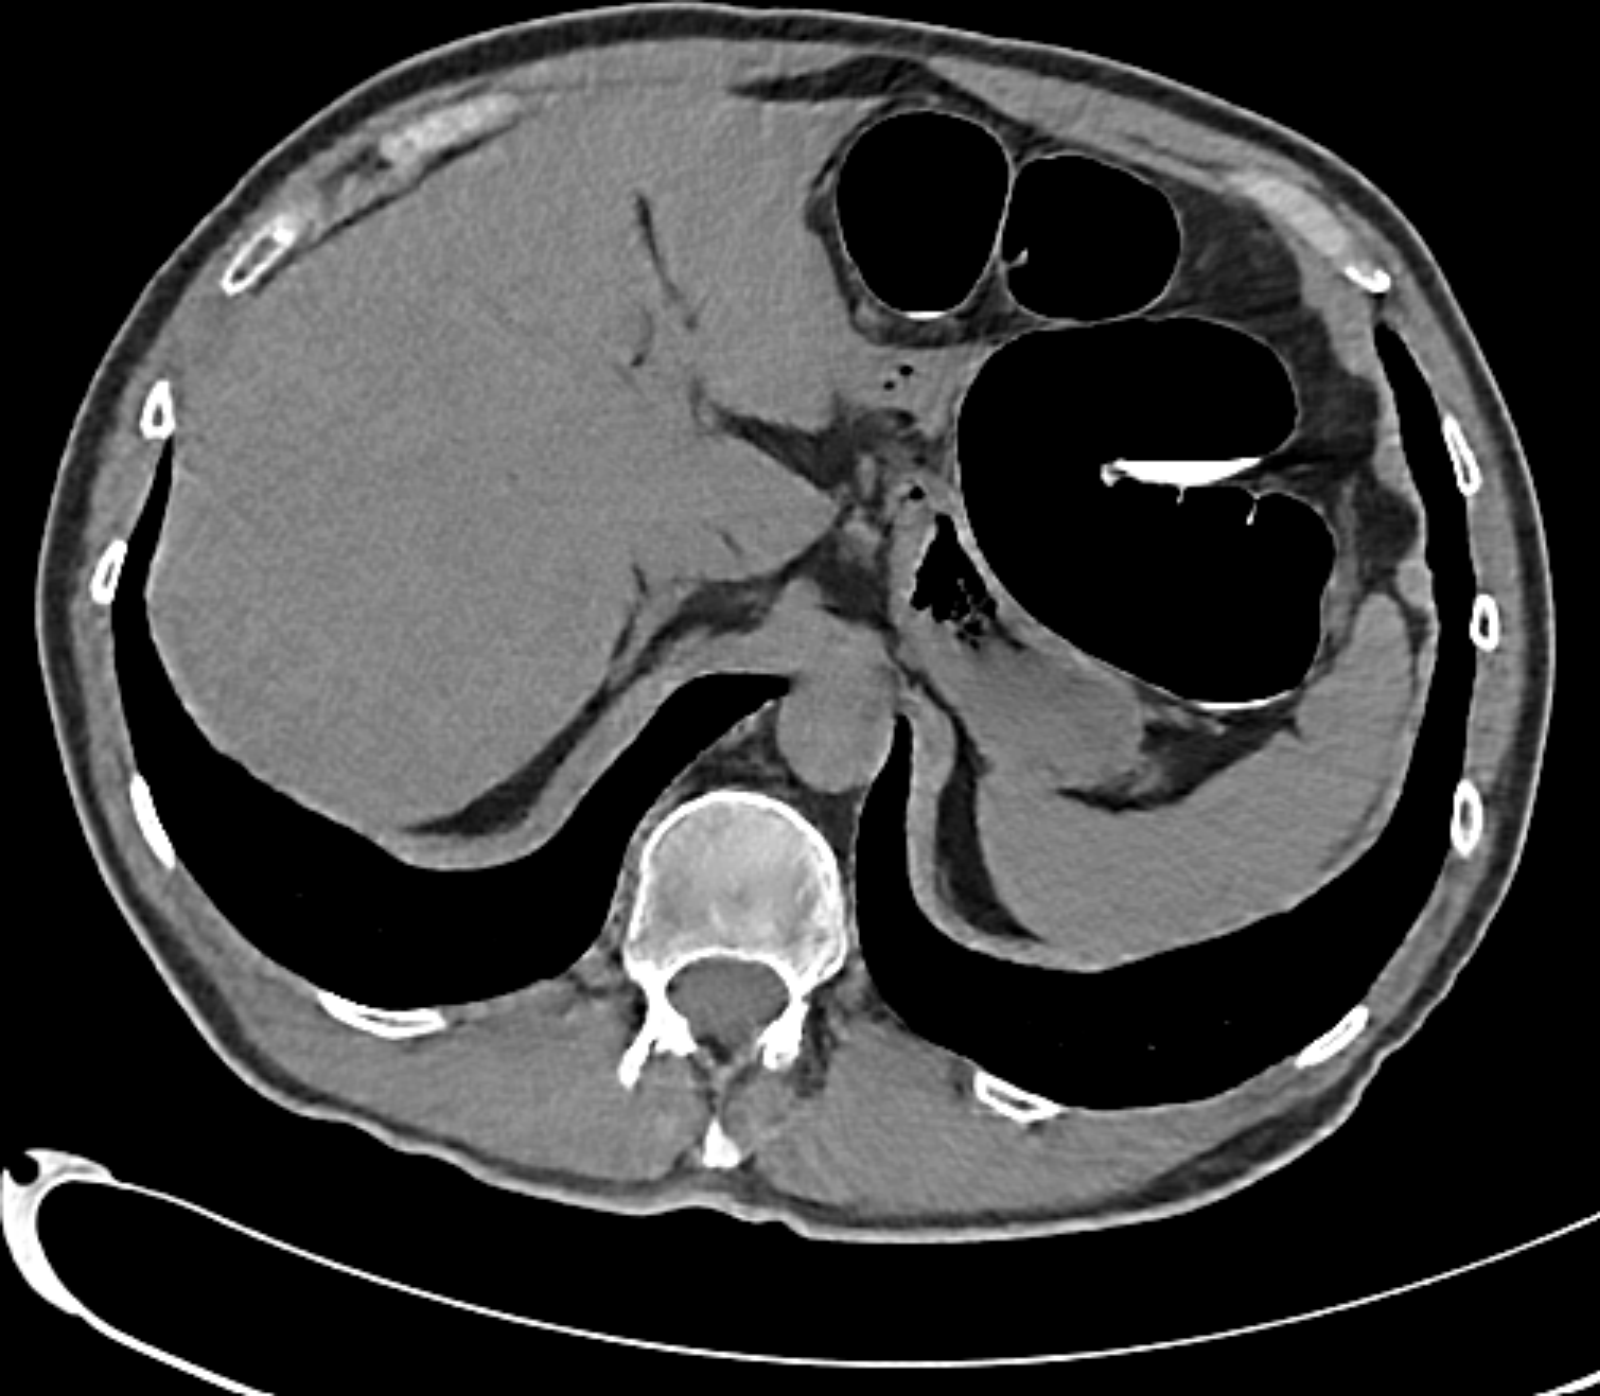
Same CT slice, Denoise off and on
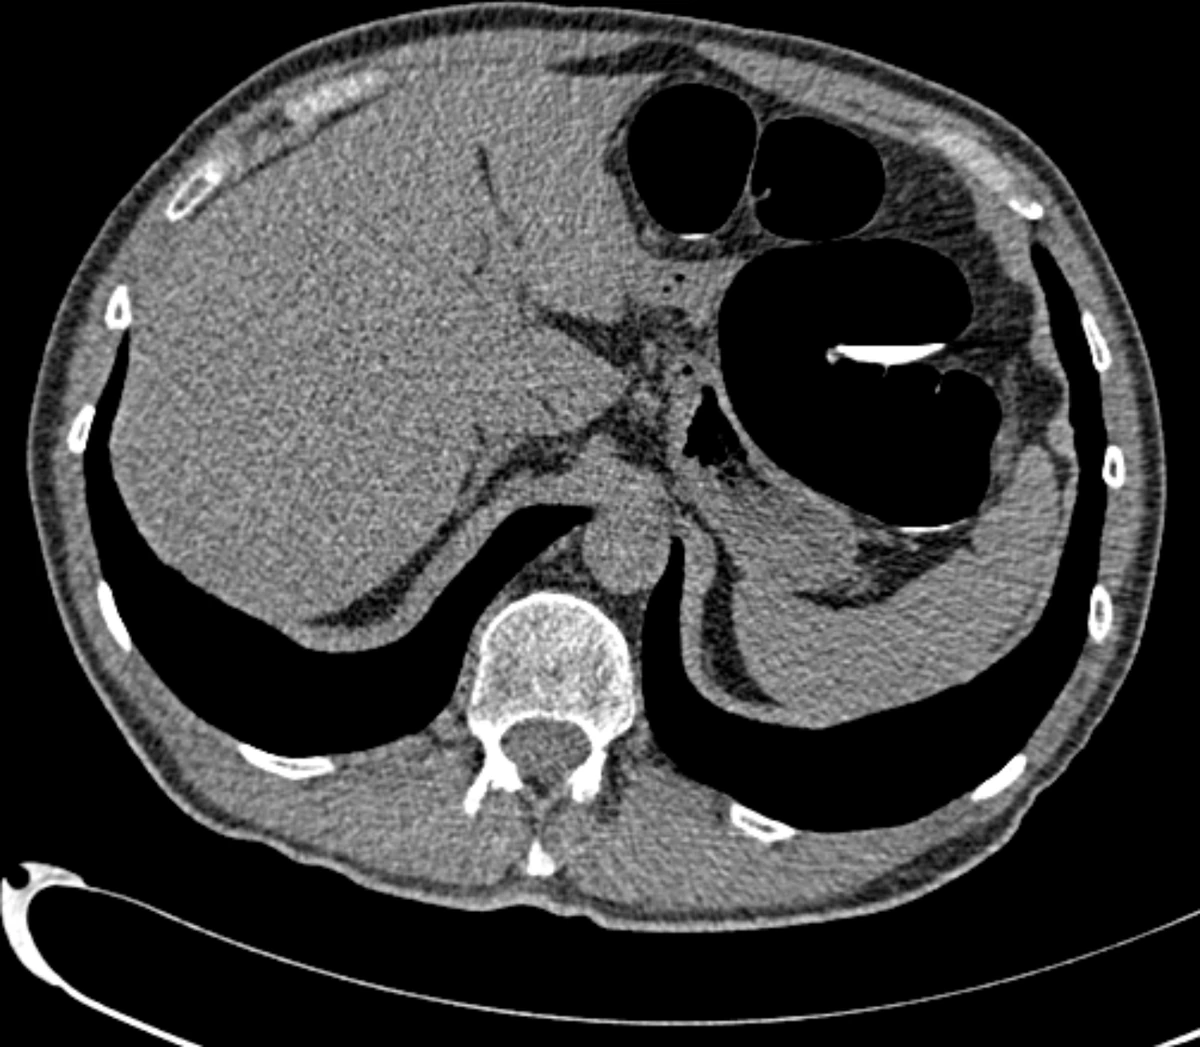
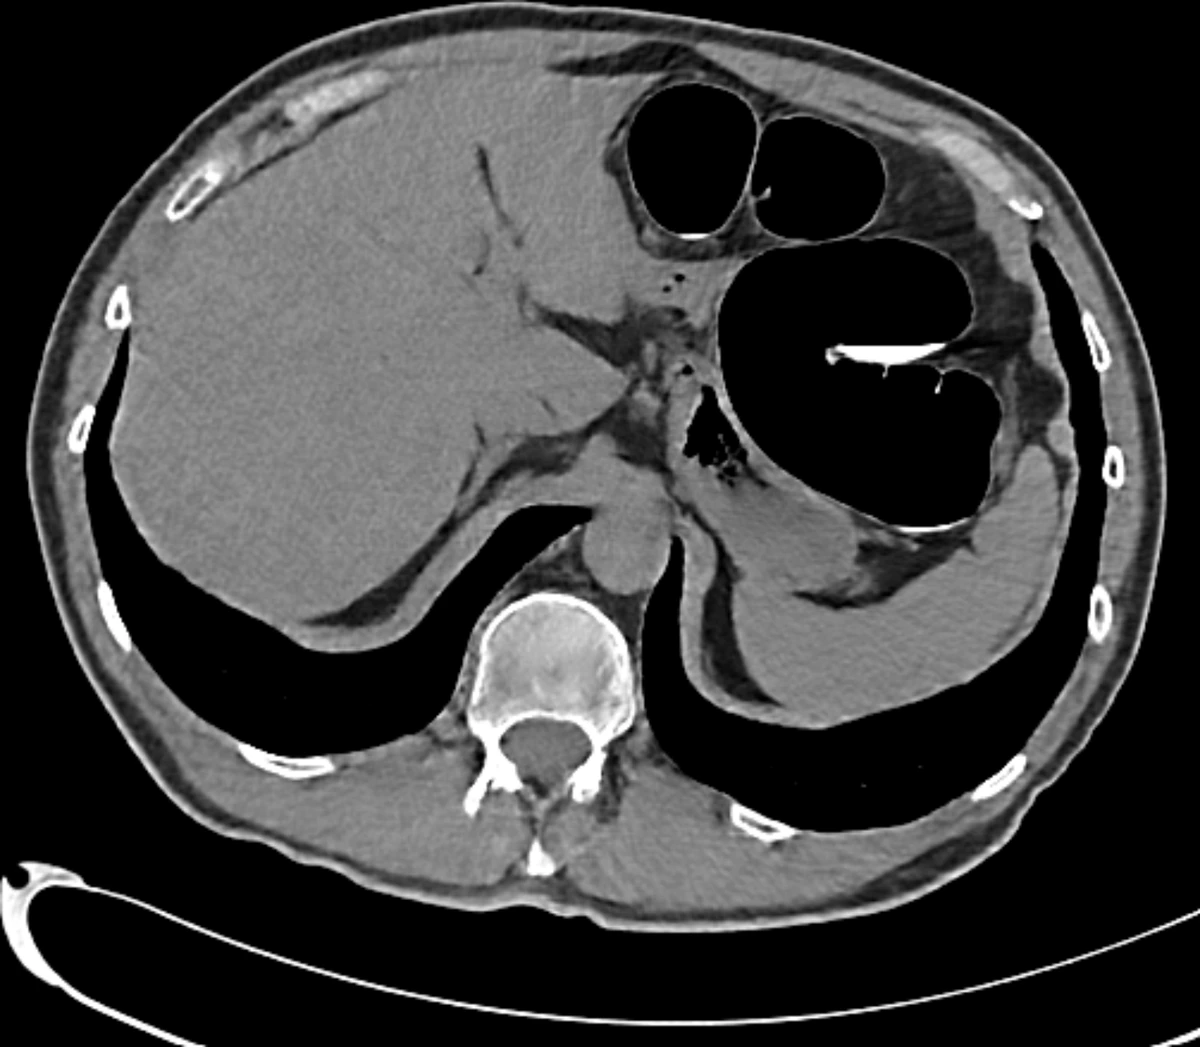
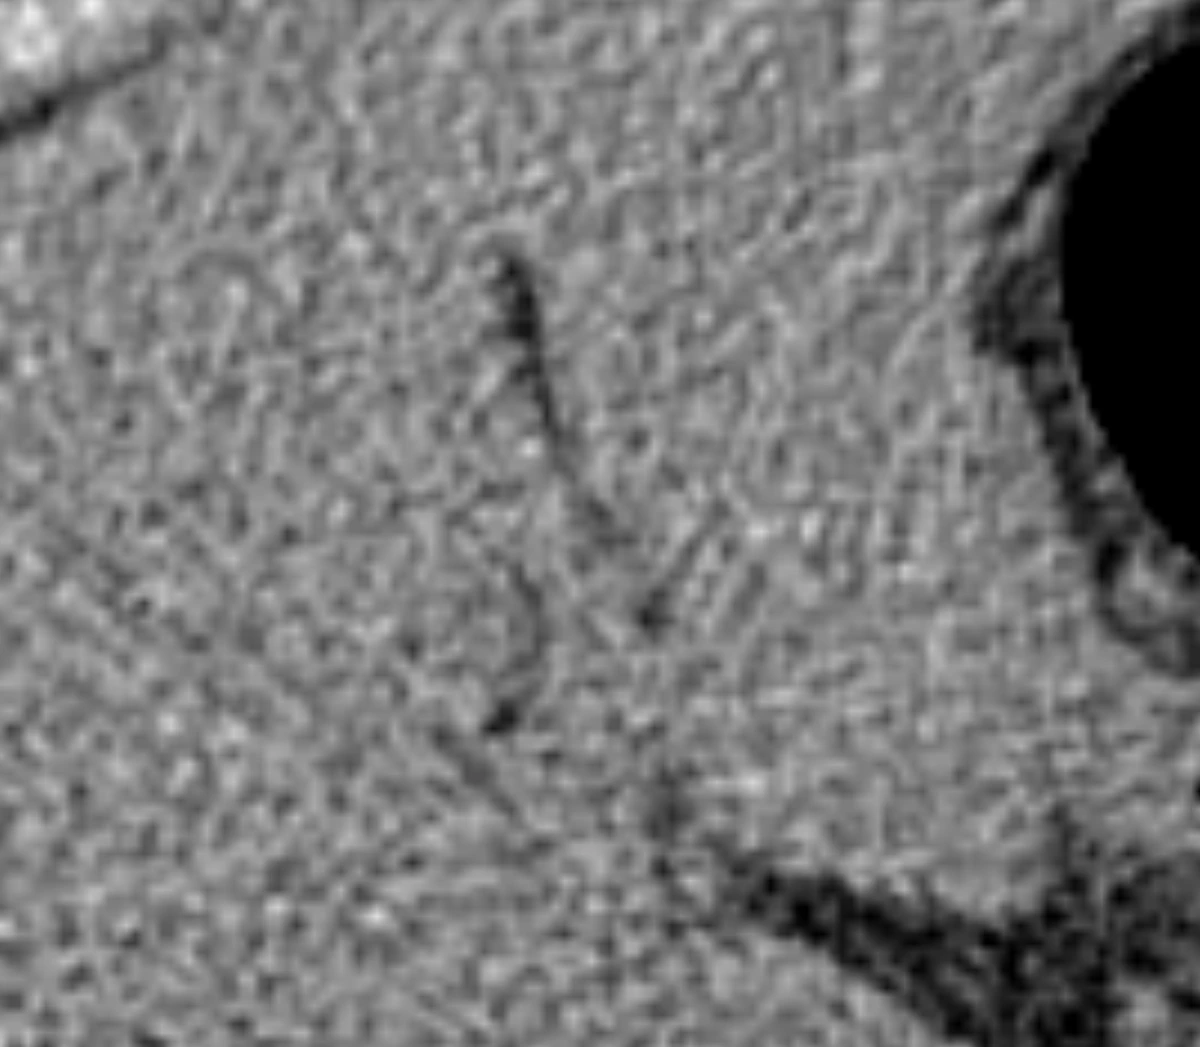
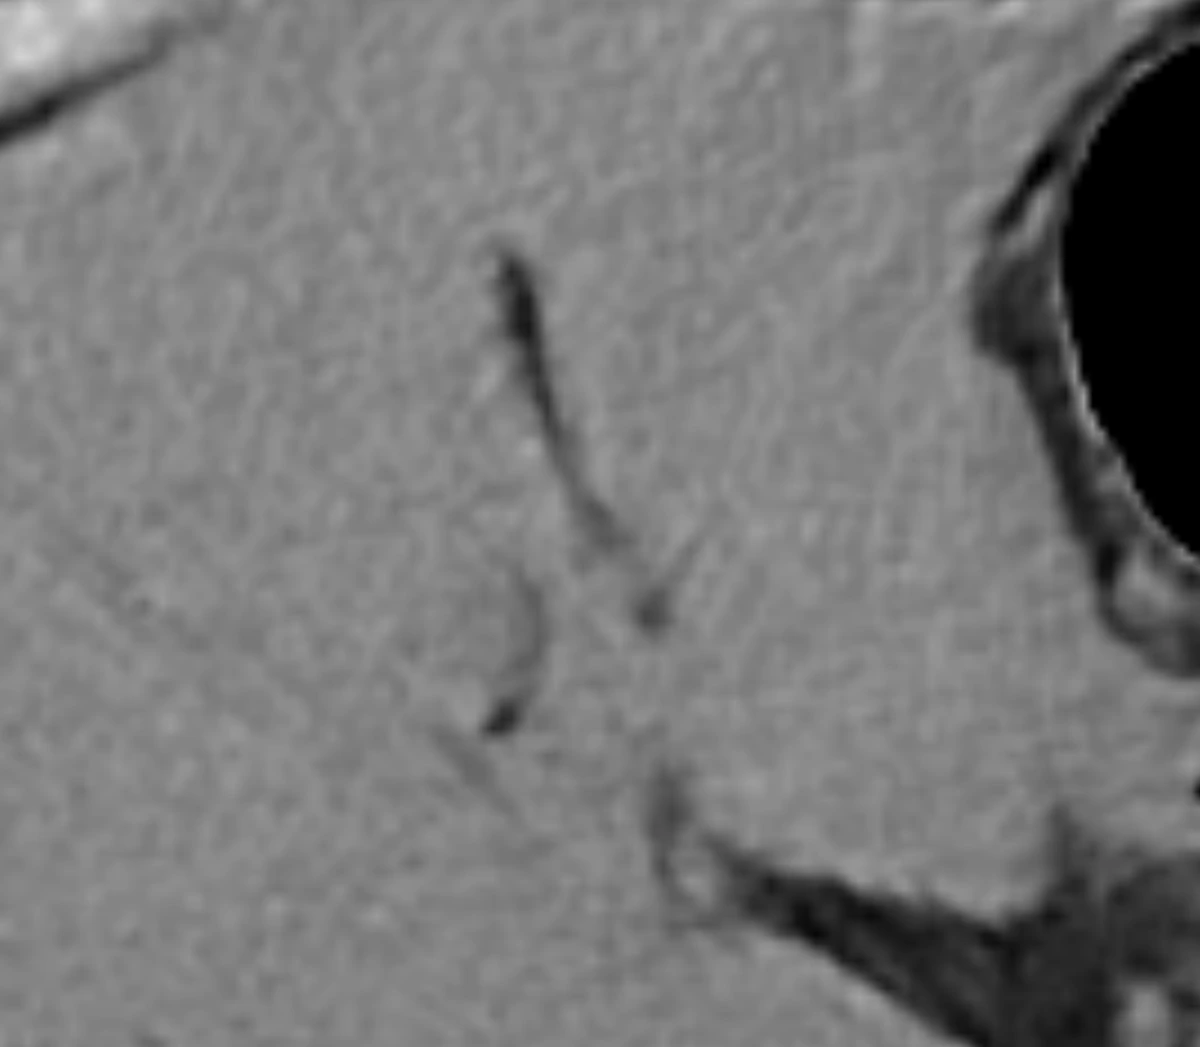
Two captures from OmniDICOM of the same CT slice at window 400 / level 40 (W400/L40): Denoise off and on. The slider is part of this web page, built from the two captures; in the app you click Denoise again, or press and hold Hold to compare in the Process panel. Images are 8-bit display captures, not HU data.
For research and education only, not for diagnosis. This applies equally to denoised and processed images.
Download both captures (PNG): Denoise off · Denoise on
Sample: CT Colonography (ACRIN 6664), TCIA, CC BY 3.0 — credits
CT, MR and X-ray
Denoise works on CT and MR series and X-ray images
On your computer
No image is uploaded
Files unchanged
Denoise never changes your DICOM files
Based on OmniDICOM 1.1.3 · Application interface: English
How to denoise a CT series
- Open the study. Choose Open Folder… from the File menu, or drag the folder into the viewer, then select the CT series in the left-hand list.
- Click Denoise in the toolbar. Every slice of the series in the active panel is denoised, starting with the one on screen. Slices already done show denoised while the rest are still running, and the button stays lit while Denoise is on.
- Click Denoise again for the original. Click once more to turn it back on, and scroll through the series as usual.
- Choose slices with the arrow. The arrow beside Denoise offers Denoise all slices; Denoise this slice, which adds the slice on screen (choose it again to take that slice back); Stop denoising, which stops the run (slices already done stay denoised); and Turn off Denoise.
- Keep it for next time, or not. Denoise is processing like any other. Until it is saved, leaving the series or opening another study asks whether to save the processing: Save, Don’t Save (Discard on Windows) or Cancel. A saved Denoise is kept for the series on this computer and runs again by itself the next time you open the series, while Professional or the trial is active.
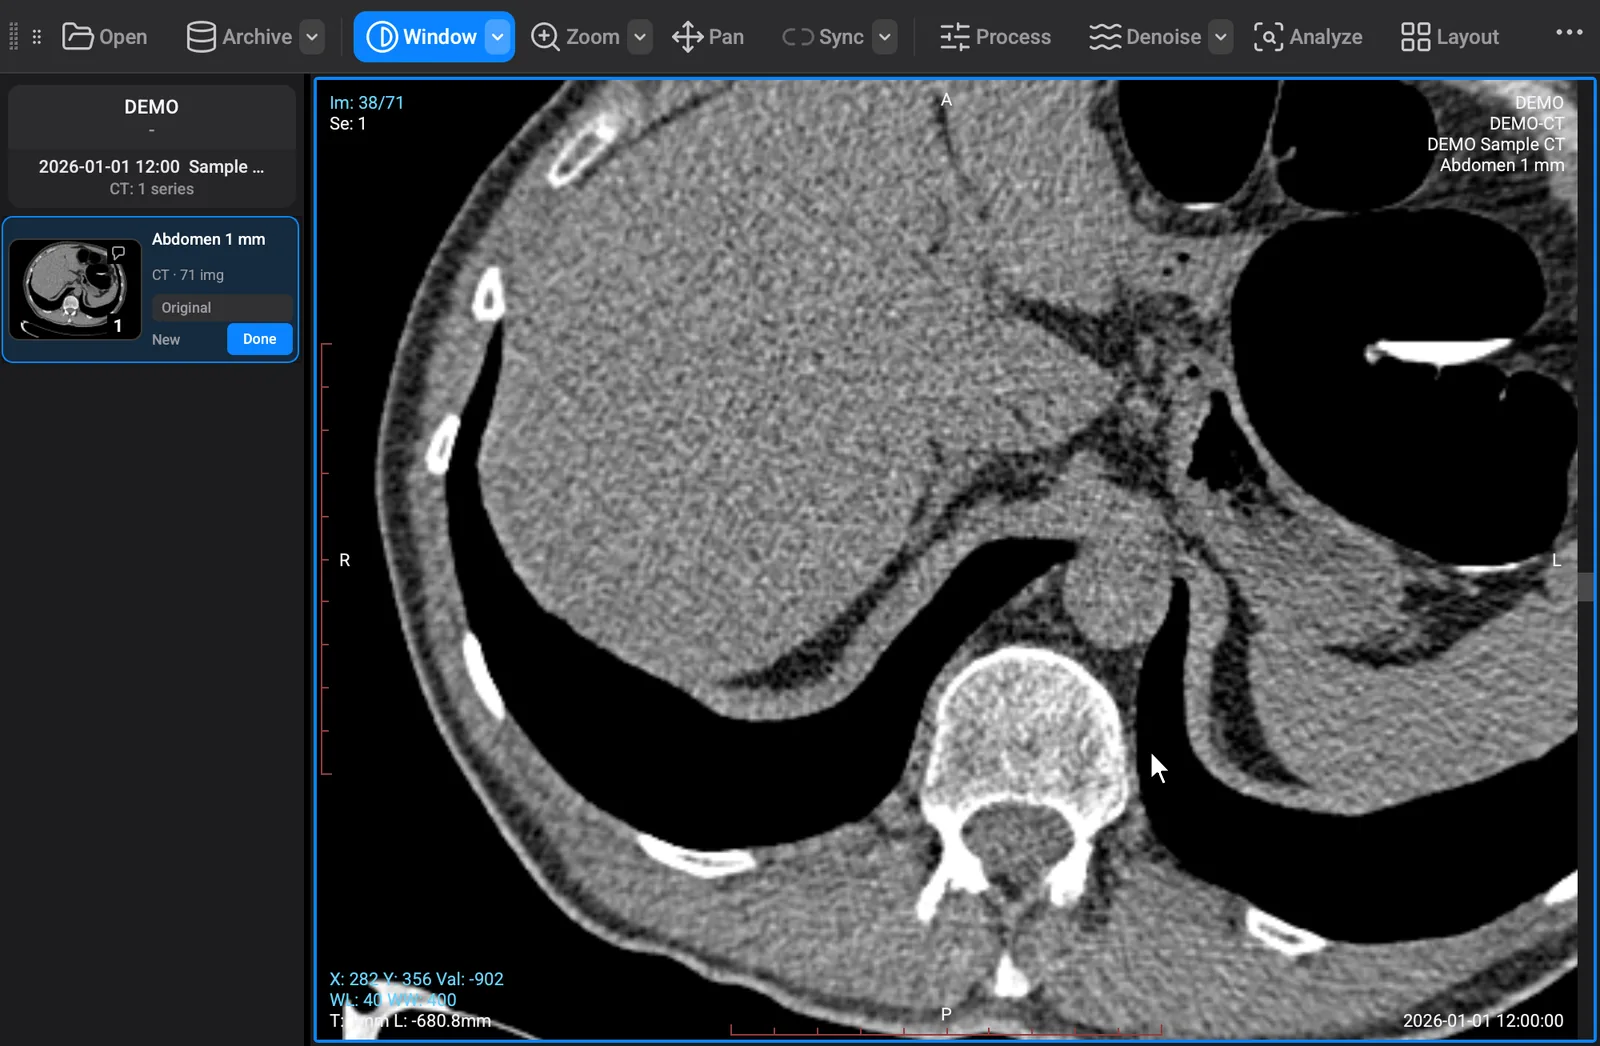
- Click Denoise
- Click again: the original
- Click again: Denoise on
- Scroll denoised slices
Denoise in the Process panel
Click Process in the toolbar. The Denoise row, above the filters in the Process panel, is the same Denoise, over the whole series. Tick it, add filters below it if you want them, and press Apply or Save & Apply. Denoise runs before the filters below it.
Apply shows the result on screen; Save & Apply also saves it for the series on this computer. Press and hold Hold to compare to see the image without Denoise and filters.
The filters are separate rows: chain up to eight of them with typed values and save the combination as a preset. Among them:
- Sharpen – unsharp mask
- Sharpen (3×3)
- Gaussian blur
- Median
- Subtract background
- Gamma
- Local contrast (CLAHE)
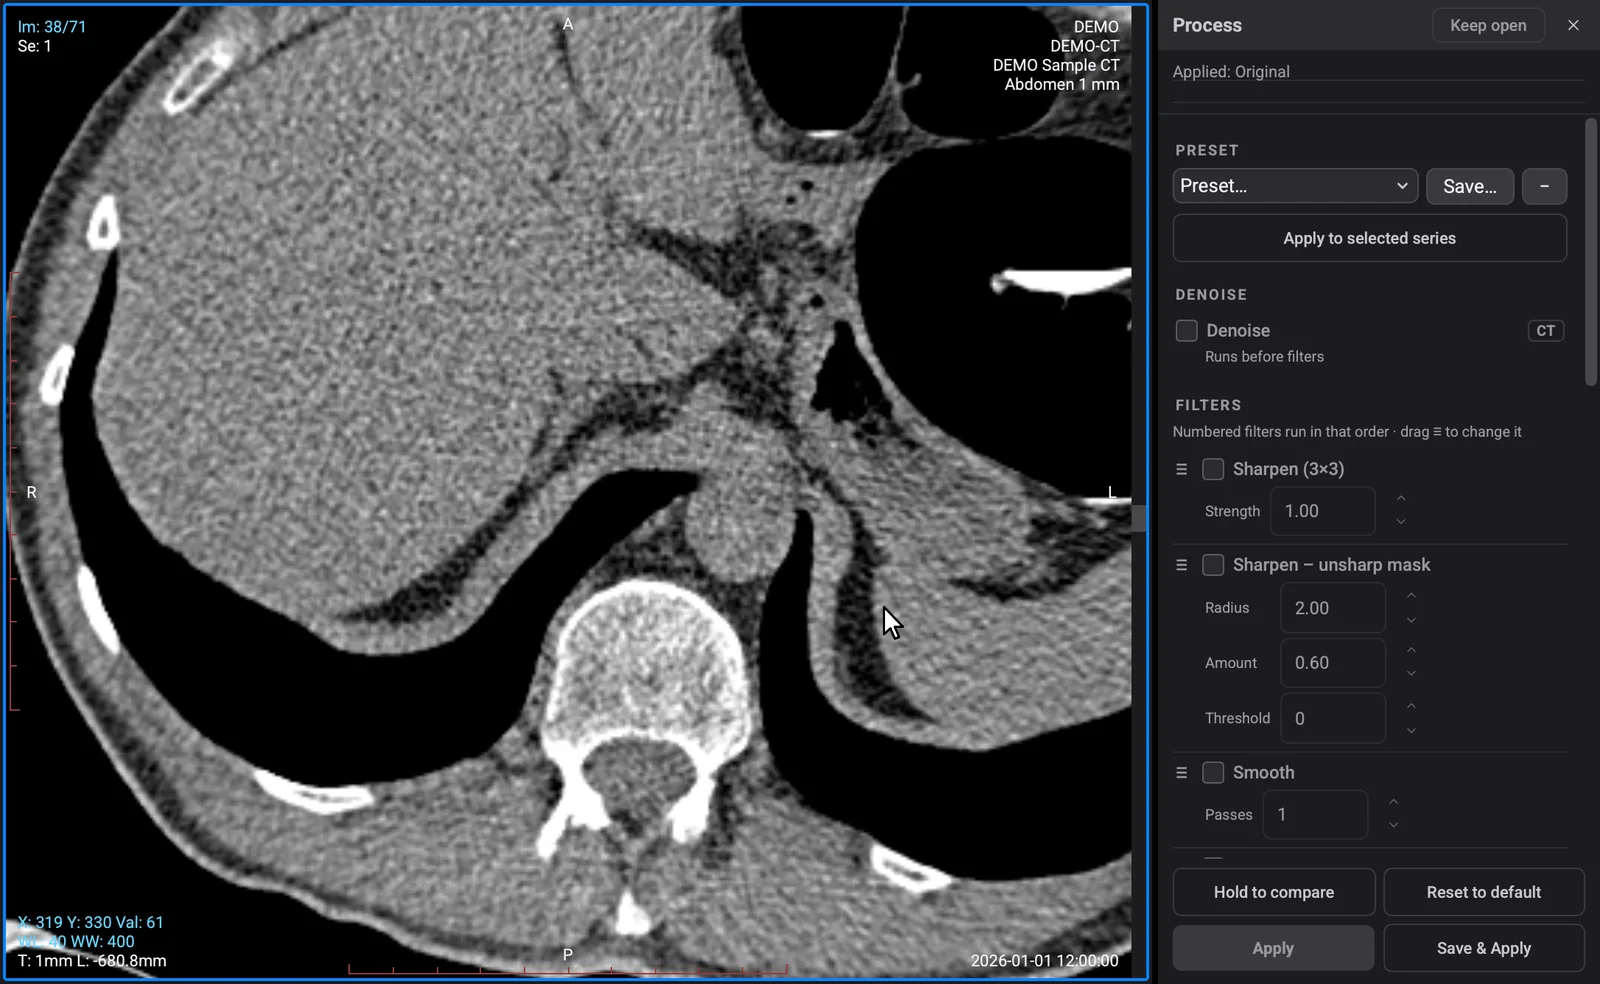
- Tick Denoise, then Sharpen – unsharp mask
- Type Radius, Amount, Threshold
- Apply
- Press and hold Hold to compare
- Save & Apply
What reads the denoised values, and what reads the original
While Denoise is on, the series is shown denoised, and its original pixels are kept. Which one a tool reads depends on the tool:
The denoised image (2D view)
- Measurements
- ROI statistics and histograms
- Profiles
- Exports
The original pixels
- MPR
- 3D
- Time-intensity curves (TIC)
- Slice projections (Z project)
While Denoise is on, Statistics, Histogram, the profiles and Particles label their results “denoised image”. Process filters change the displayed image, not the values you measure: measurements read the stored values, or the denoised values while Denoise is on.
What you need
- A CT, MR or X-ray series. Denoise works on CT and MR series, low-dose CT data included, and on X-ray images (CR, DX, DR and RG). For other modalities, mammography included, the Denoise button is greyed out and says so. On an X-ray series the menu, the status bar and the image corner say image instead of slice.
- Professional. Every computer starts with a 14-day Professional trial that includes Denoise, no card required. After it, Professional is $45 a month or $449 a year per computer; Basic does not include Denoise.
- Mac: Apple silicon. The viewer runs on macOS 13 or later; Denoise needs macOS 14 or later, and on macOS 13 it says so when you press it.
- Windows: 64-bit Windows 10 or 11. Denoise uses the graphics card through DirectML where available, otherwise the processor.
- Either platform. Mac and Windows run the same app: the same buttons, steps and saving.
CT noise reduction on your own computer
Denoise is computed on your own computer, and no image is uploaded, to us or anyone else. The rest of the viewer works the same way: studies are opened, denoised and processed locally. An internet connection is needed to start the trial and for licensing and update checks; PACS transfers use the servers you configure.
Denoise never changes your DICOM files. A saved Denoise is a choice kept for the series on this computer, not a change to the files.
Common questions
Does Denoise change my DICOM files?
No. Denoise never changes your DICOM files. It is shown in the viewer and can be saved for the series on this computer, like other processing; a saved Denoise runs again the next time you open the series, while Professional or the trial is active.
Is it for diagnosis?
No. OmniDICOM is for research and education only. It is not a medical device and is not intended for diagnosis, primary interpretation or clinical decision-making. This applies equally to denoised and processed images.
Which scans does it work on?
CT and MR series, low-dose CT data included, and X-ray images (CR, DX, DR and RG). For other modalities, mammography included, the Denoise button is greyed out.
Does it work on Mac and Windows?
Yes, the same app on both. On a Mac with Apple silicon, Denoise needs macOS 14 or later. On 64-bit Windows 10 and 11 it uses the graphics card through DirectML where available, otherwise the processor.
Do I need Professional?
Yes. Denoise is a Professional feature, and the trial includes it: every computer starts with 14 days of Professional from its first launch, no card required. After that, Professional is $45 a month or $449 a year per computer.
How do I compare with the original?
Click Denoise again for the original, and once more to turn it back on. In the Process panel, press and hold Hold to compare to see the image without Denoise and filters.
TRY IT ON YOUR OWN CT SERIES
Try Denoise free for 14 days.
Free download, no card. The 14-day Professional trial, Denoise included, starts on first launch with an internet connection. After it, Basic is $10 a month and Professional, which includes Denoise, is $45 a month per computer. Trial image exports carry a watermark.
macOS 13+ · Apple silicon · signed, notarized PKG · Denoise: macOS 14+
Windows 10/11 · 64-bit · signed EXE
More about Denoise
Image credits
The comparison and the clips are captures of the OmniDICOM app; pointers are drawn in and waits are cut. CT Colonography (ACRIN 6664): Smith K, et al. (2015), The Cancer Imaging Archive, doi:10.7937/K9/TCIA.2015.NWTESAY1, CC BY 3.0, modified.